fnOS 飞牛系统上用 Cloudflare Tunnel 实现内网服务外网访问
互联网活菩萨 Cloudflare 的免费服务,可以将内网的服务映射到公网,对于没有公网 IP 以及不想折腾 IPv6 的人来说是真是好东西,又免费又快,冲冲冲。
设置 DNS 托管
如果在没有公网IP的情况下需要映射到公网,那么域名就是必要的。所以,需要先在 https://dash.cloudflare.com/ 中接管一个域名【需要自己先去注册购买一个】,打开网站,直接 添加域 然后一步一步按着步骤走就行了。

然后,将生成 DNS 地址复制到购买厂商的那里的修改如下:
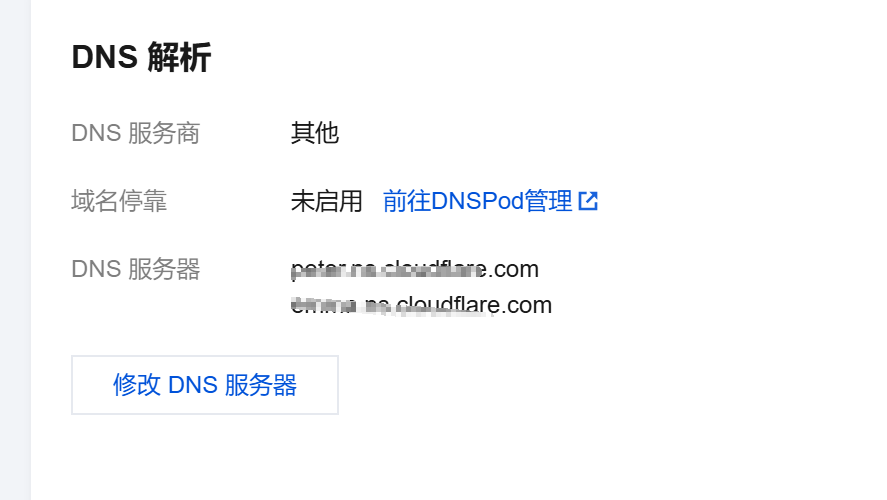
然后等待邮箱收到如下成功的邮件。

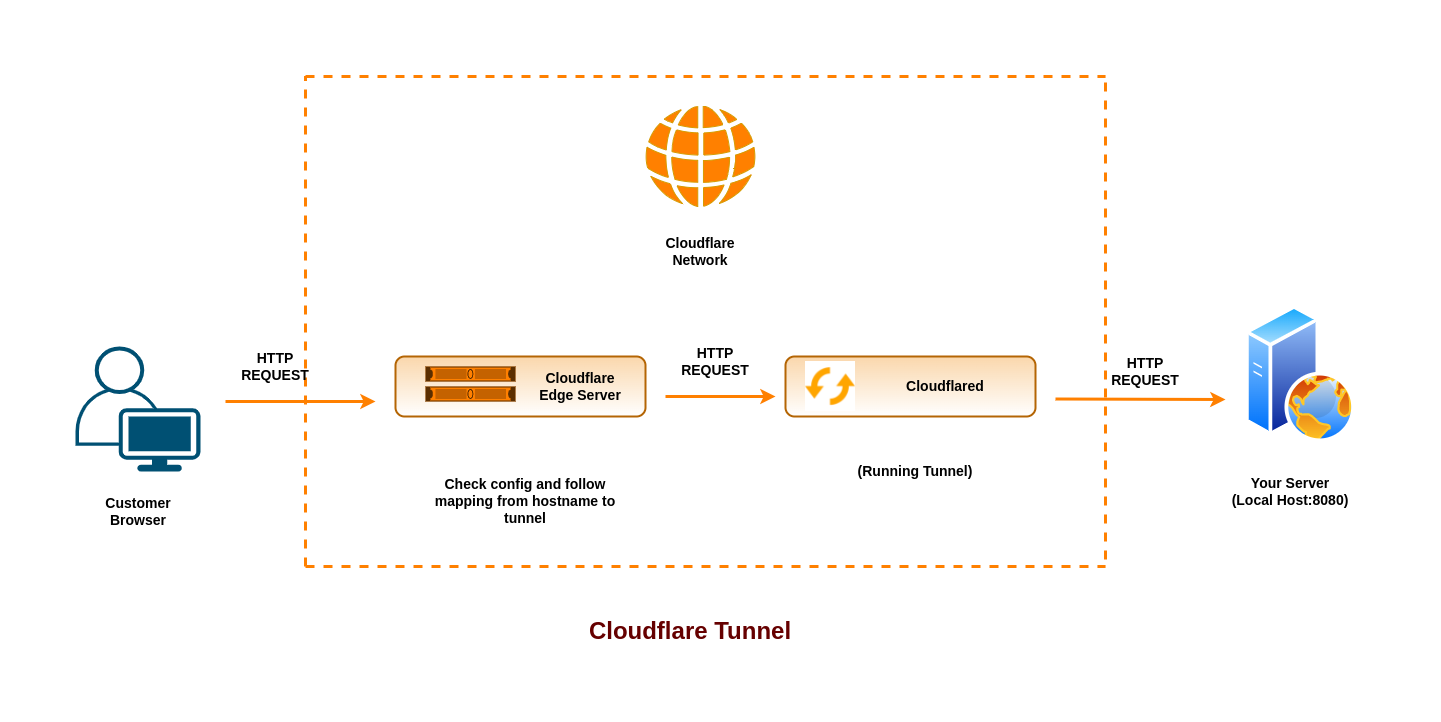
生成 Clareflare Tunnel Token
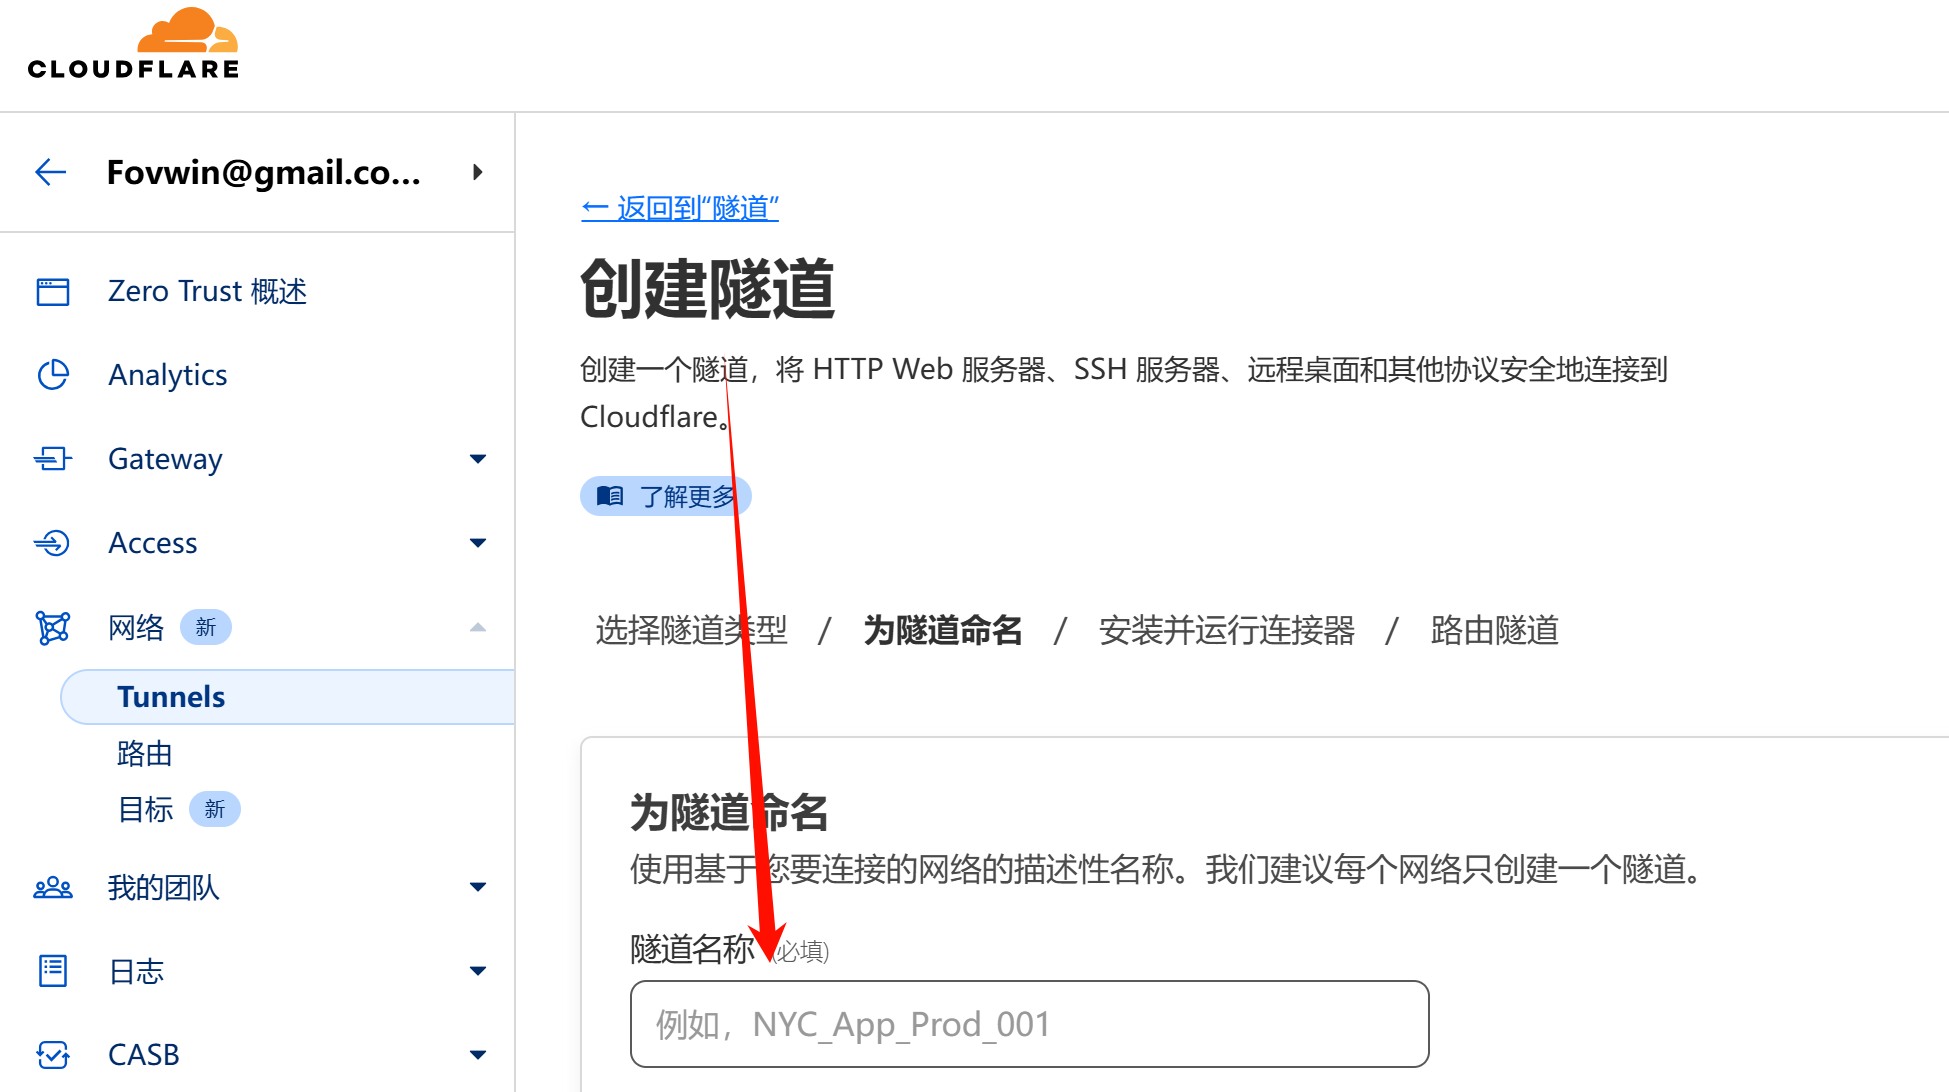
进入 Tunnel 如下:

点击 创建隧道 ,然后选择 Cloudflared ,完成隧道名字的输入,比如 fnOS。
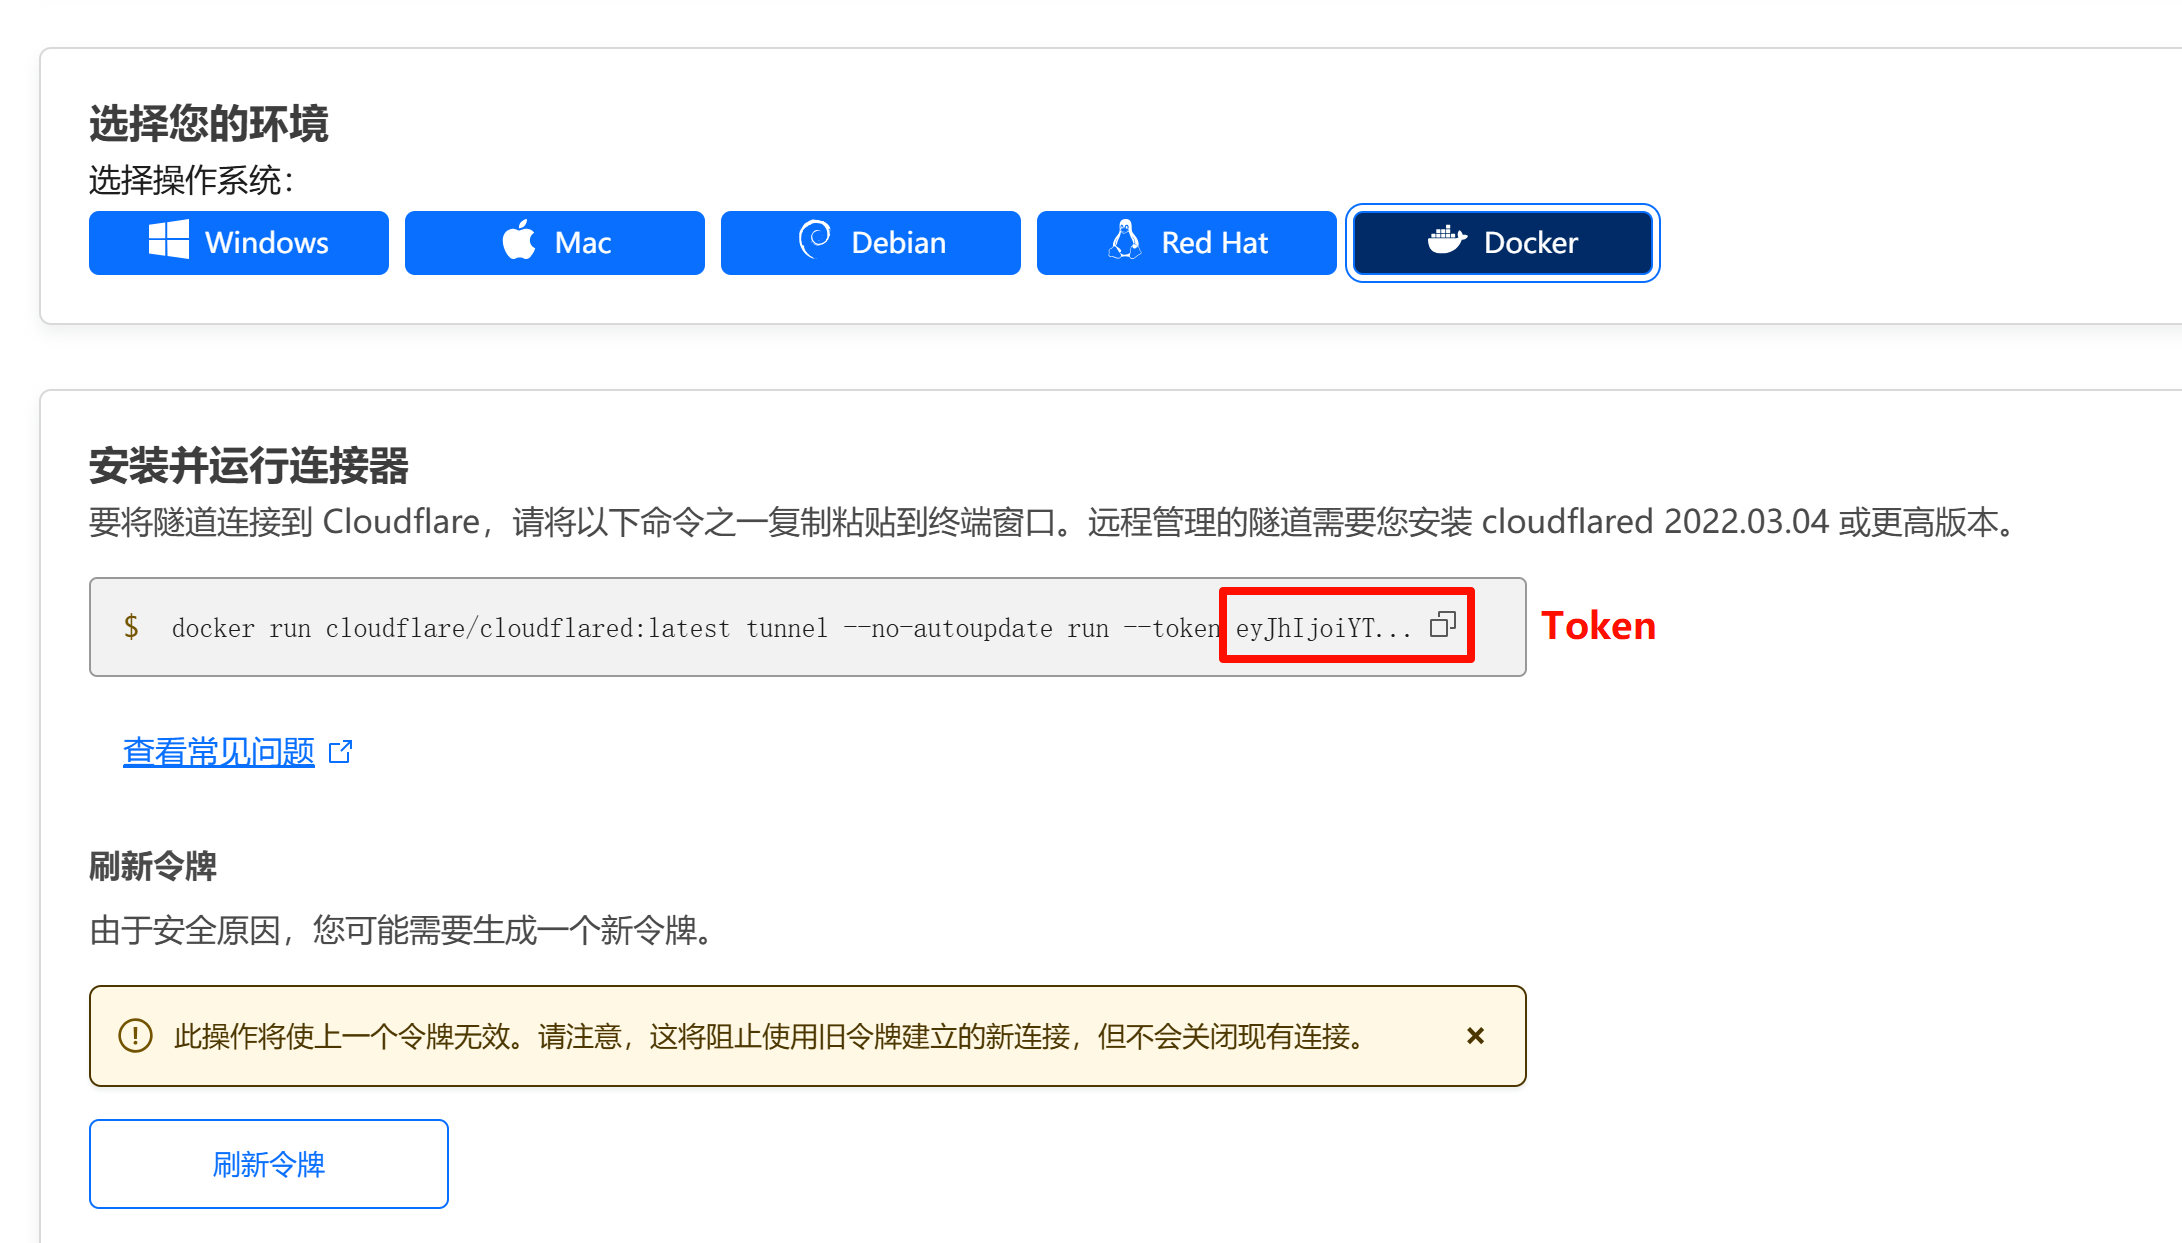
选择 Docker 方式,然后将其中的 Token 复制出来。
fnOS 上用 Docker 安装客户端
打开 fnOS 的 Docker,采用 Compose 的方式进行安装。
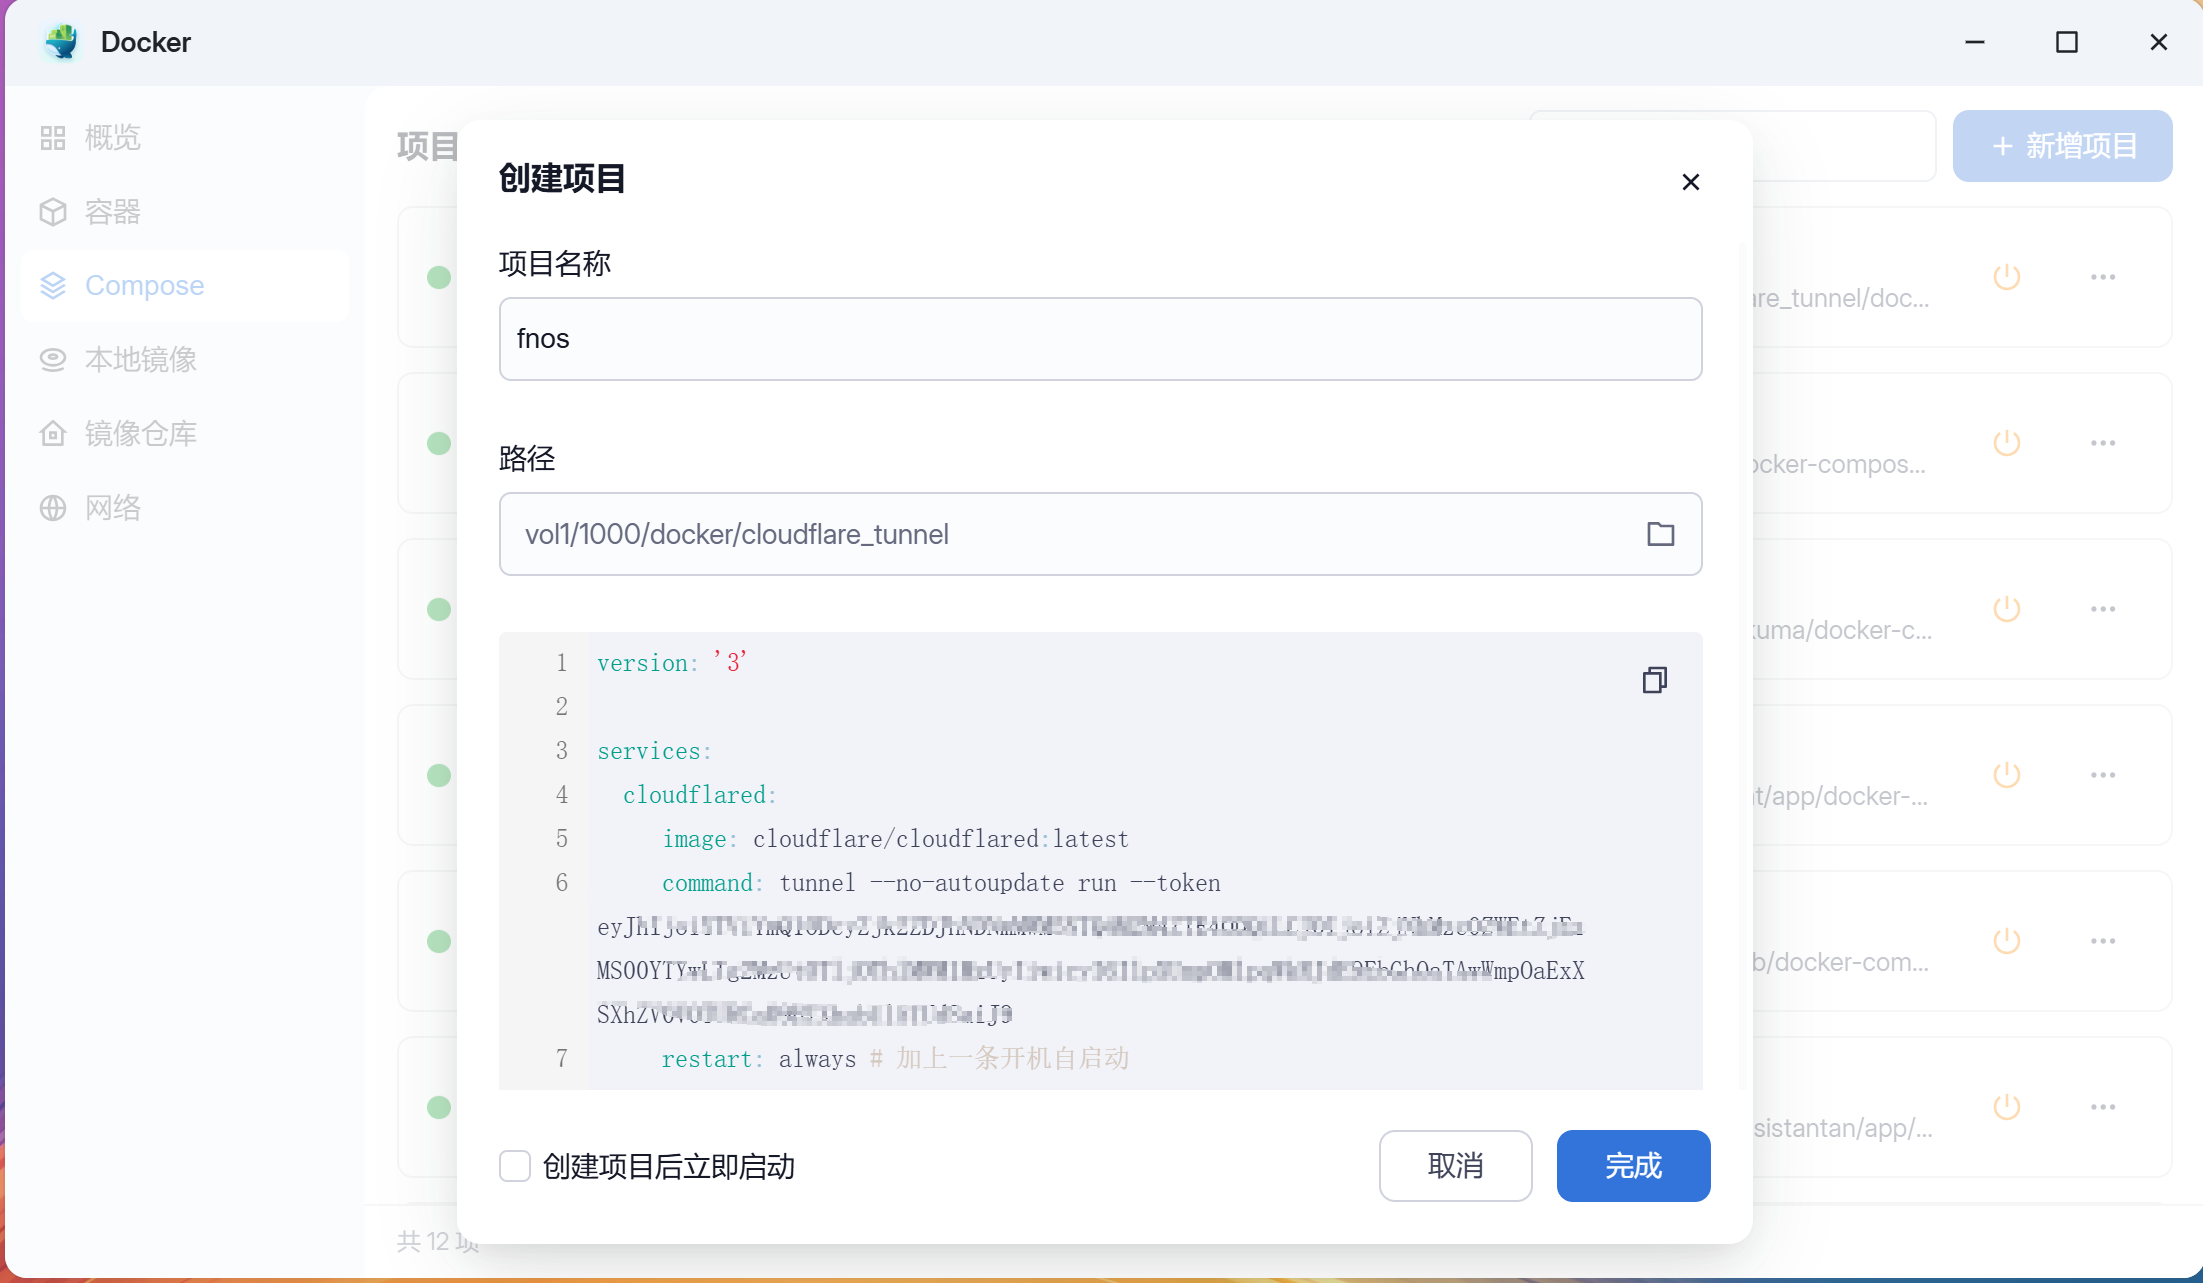
其中的代码如下:
version: '3'

services:
  cloudflared:
    image: cloudflare/cloudflared:latest
    command: tunnel --no-autoupdate run --token xxxxxxx
    restart: always # 加上一条开机自启动
启动后,会在 Cloudflare 下面出现上面安装的客户端。

映射内网服务
添加公共主机名:

然后填入内网的服务地址:端口和前面接管 DNS 的二级域名名称。

然后,直接打开二级域名就可以访问了。